PCB Soldering, Using a Nix Flake, and Cross Compilation
Hello! I have been working on this project here and there over weekends and whatnot, so here are some recent(ish) updates!
PCB Soldering
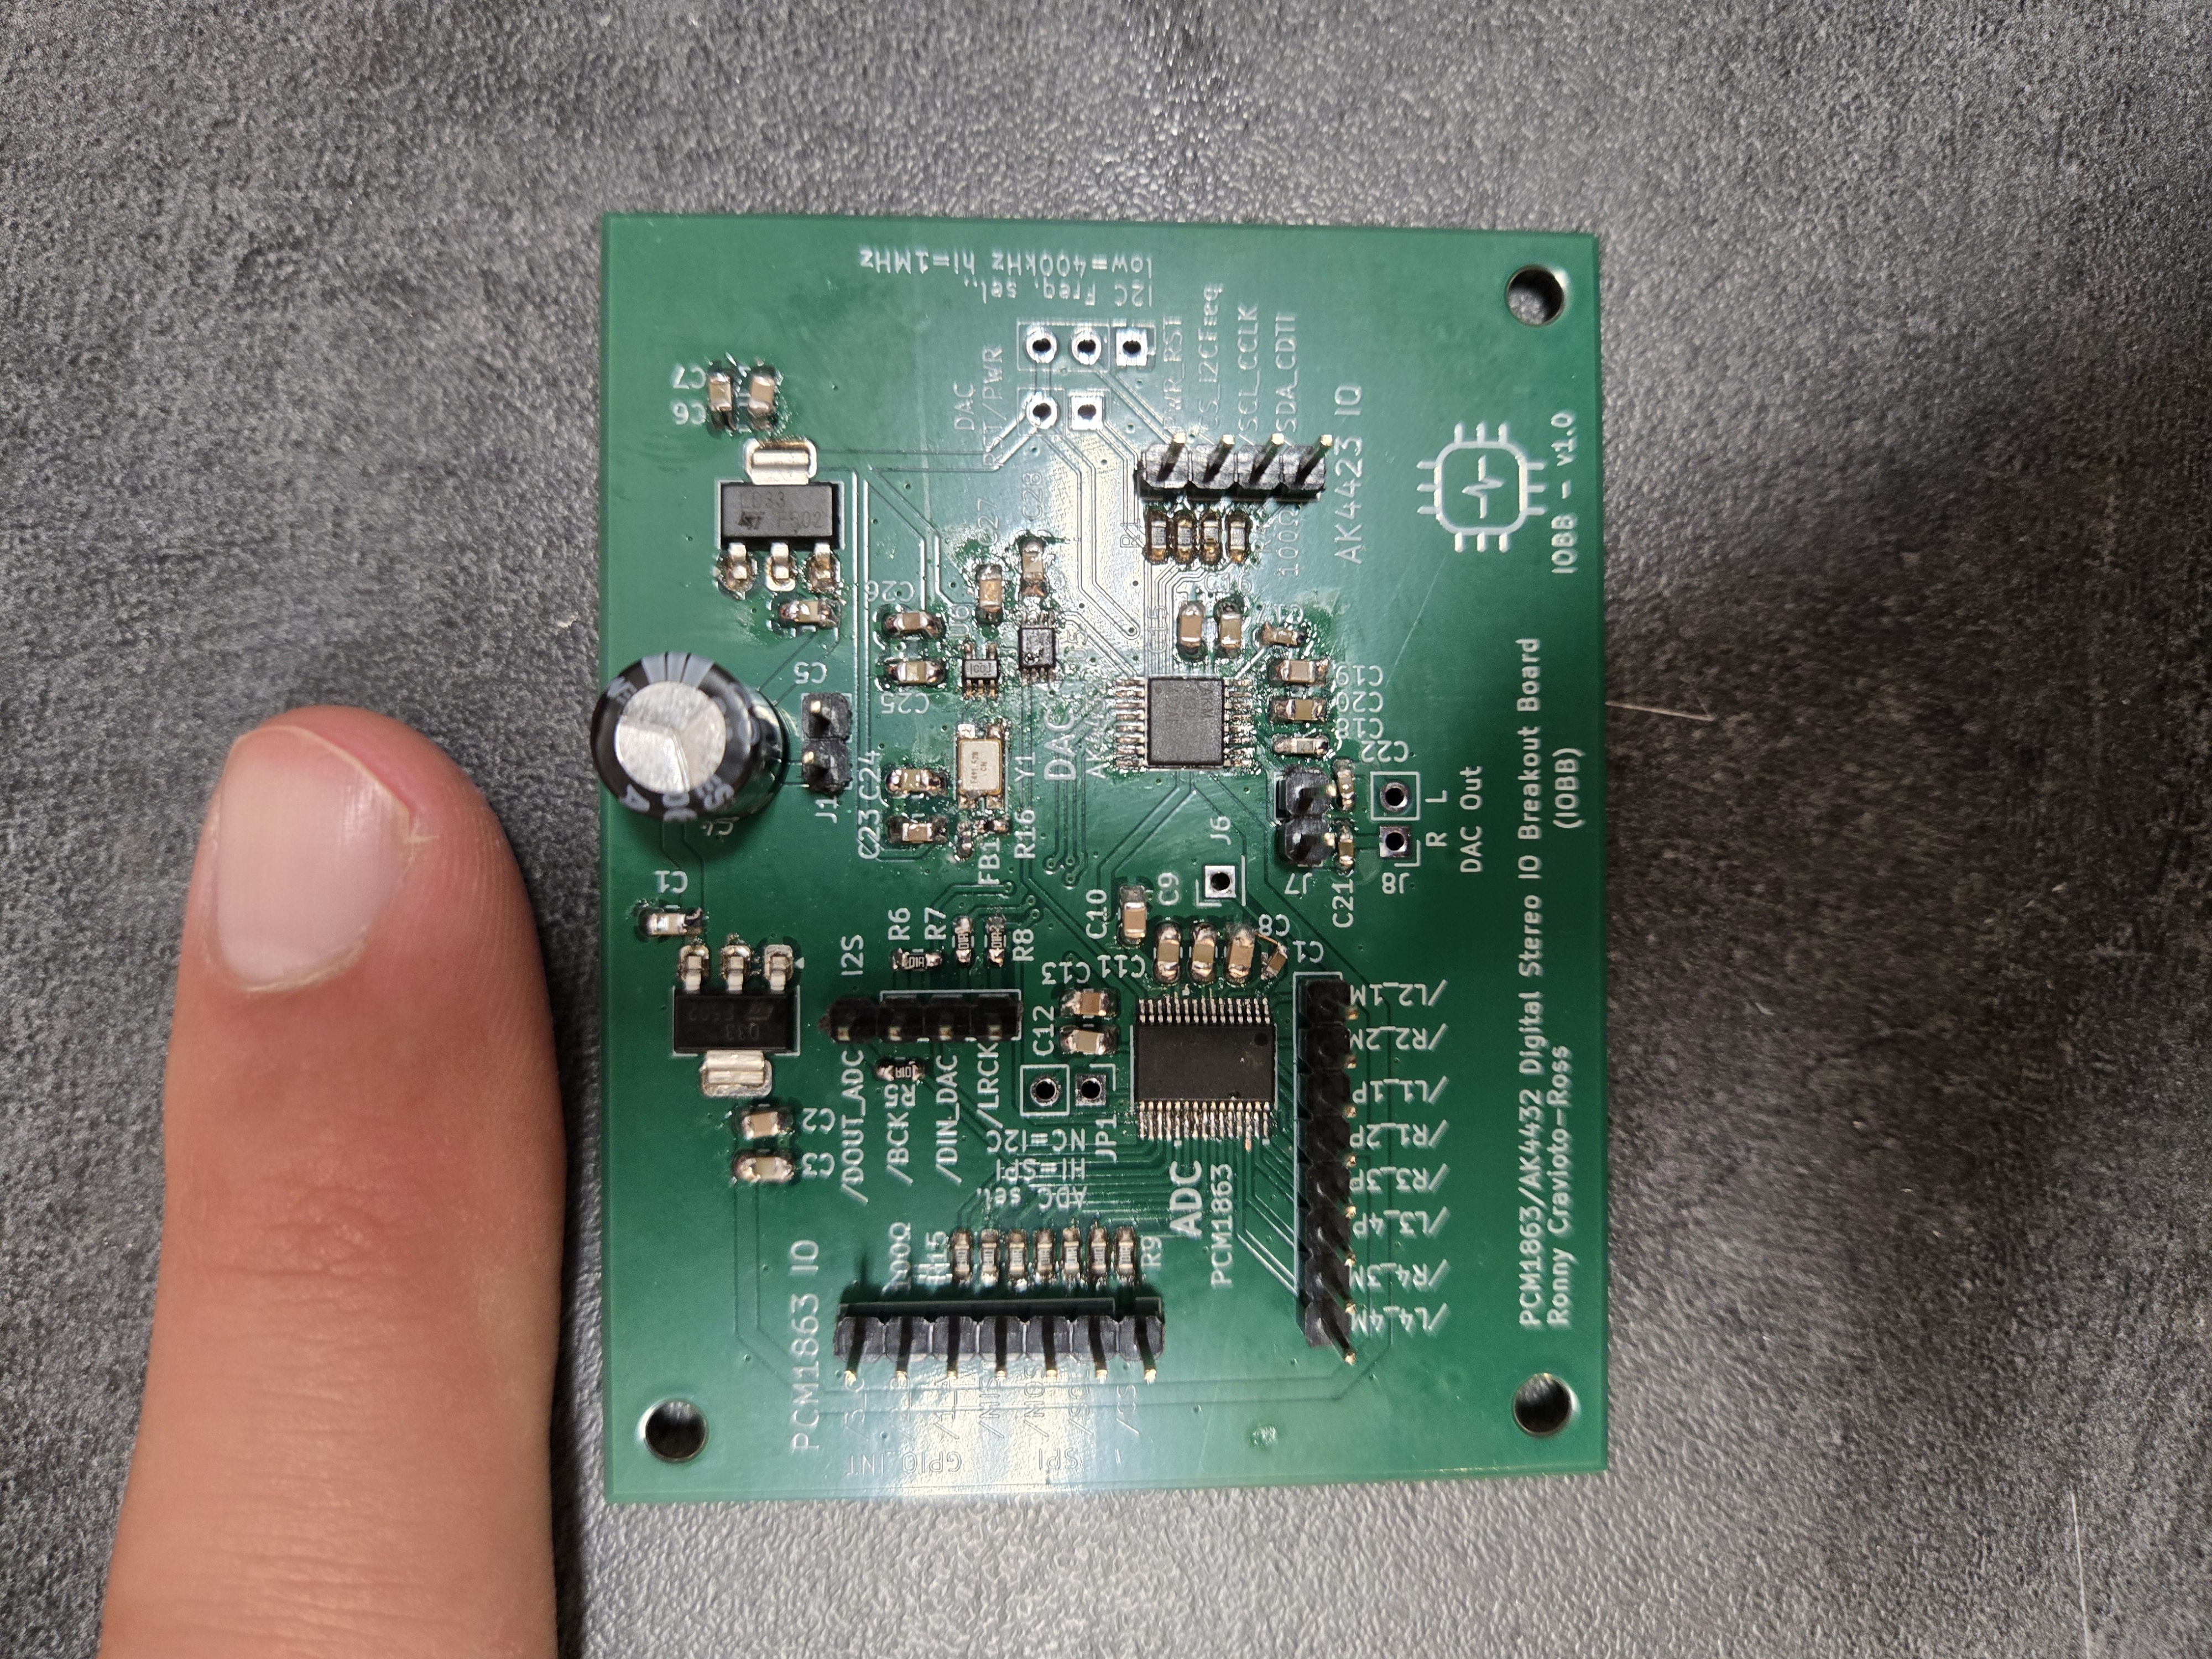
I finally got around to soldering up the ADC/DAC breakout board (see this post), which was fun, since I reflow soldered some of the components (crucially the crystal oscillator, which had pads on the bottom of the package which are kind of impossible to solder), and hand-soldered other components (the ADC and DAC were fun since they came in TSSOP packages). See below a picture of a board post-soldering, with my index finger for scale:
PCB Testing (Pt 1)
I tested the clock generator circuit with my Digilent AD3 oscilloscope. This was interesting, because the master clock is running at 49.152MHz, whereas my AD3 has a maximum sample rate of 100MHz, so I was trying to measure something very close to the Nyquist frequency. As a result of this, each period of the clock was two data points, as shown below:
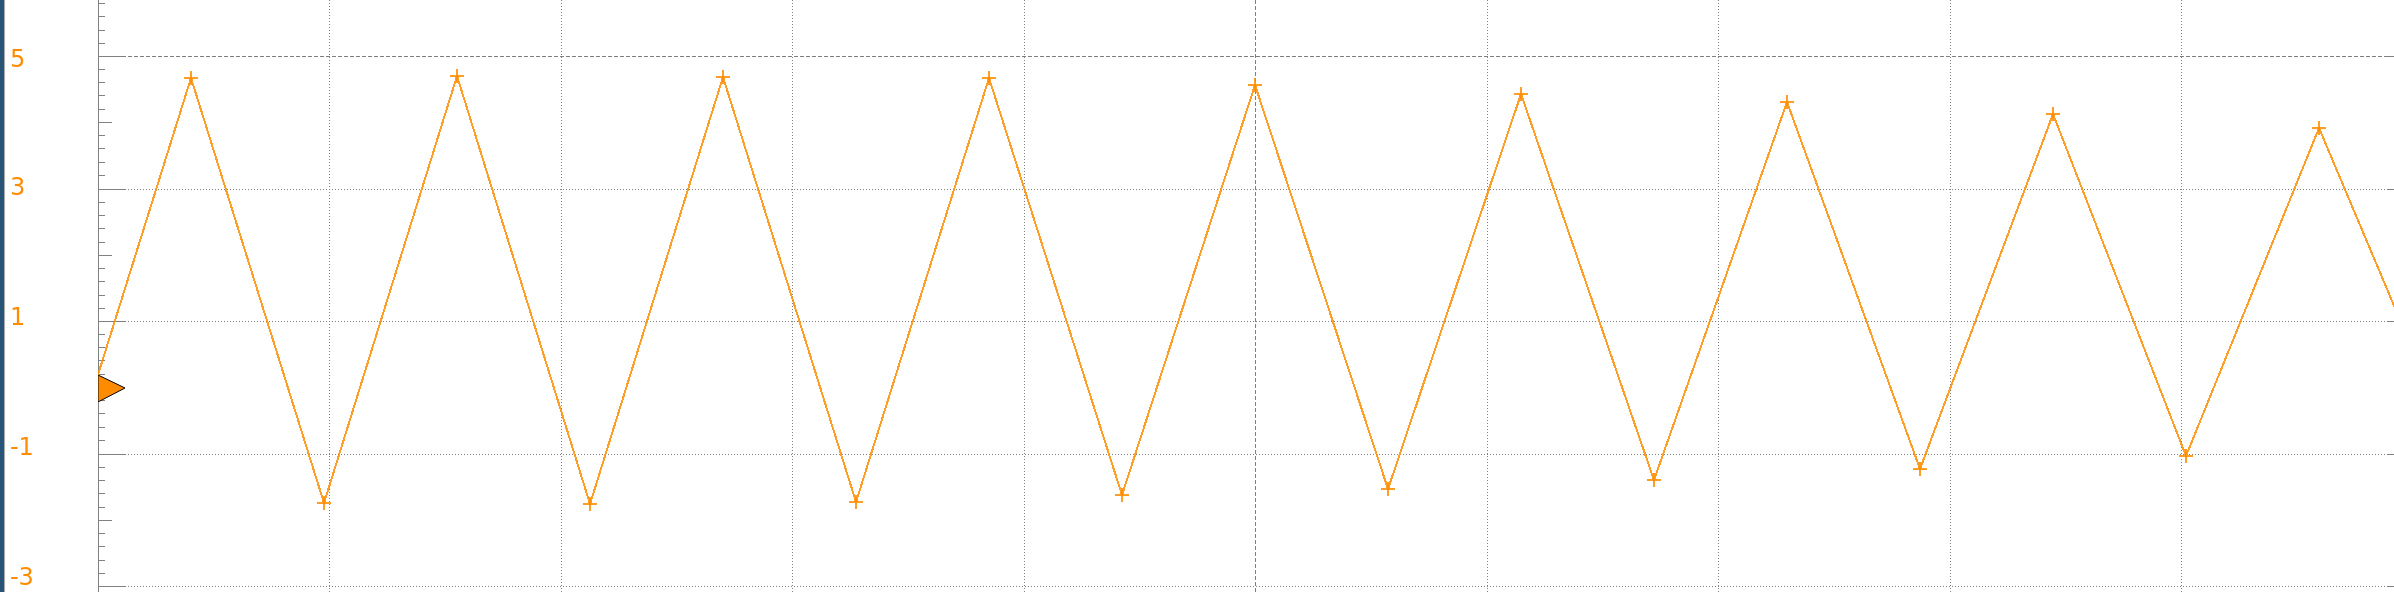
This makes sense, since 100MHz should give us two samples per period at a frequency of ~50MHz. Zooming out shows a beat pattern, which happens because the clock frequency is not exactly the nyquist:
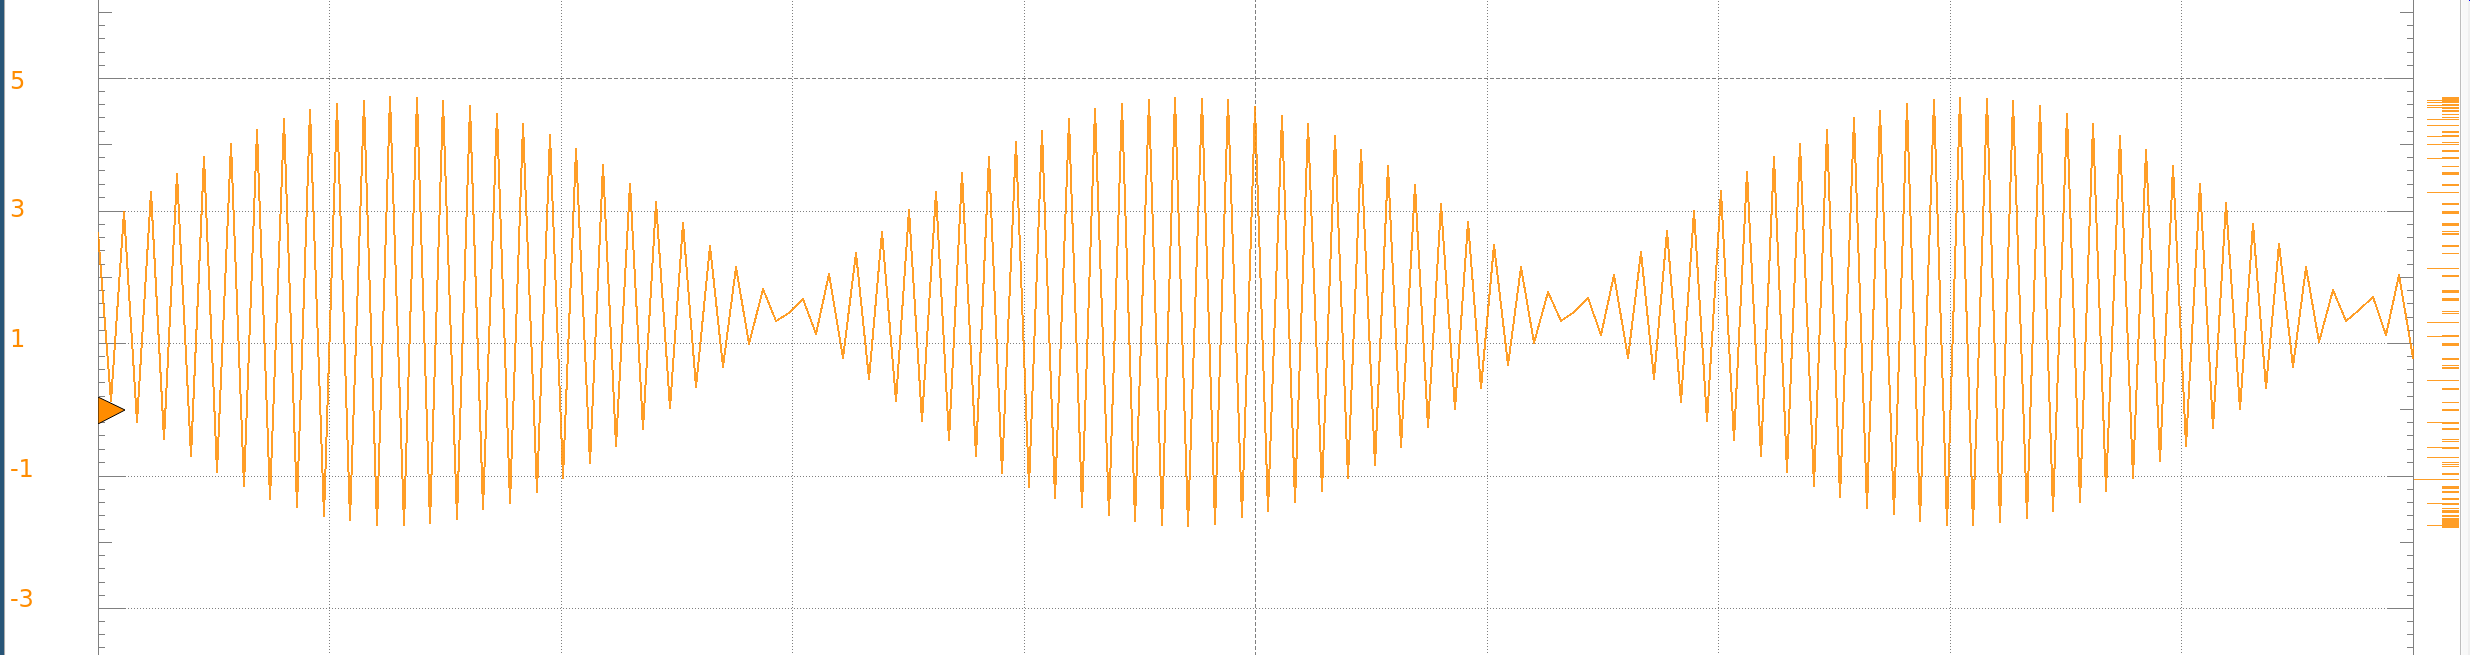
I also measured the output of the frequency divider (flip-flop), which was designed to output a signal at half the frequency:


This confirms that the clock signal generation is working as designed, so the next step in testing this board will be to connect to the ADC and DAC through I2C and see if I can get the I2S audio input/output running!
Code Restructuring, Nix Flake, Cross-Compiling
I put all three code modules (bare-metal, userspace, and kernel module) into a monolithic git repo, and wrote a nix flake to compile the rust programs (the bare metal binary and the userspace ui program). I hadn’t used a nix flake before (historically I just use a shell.nix), so I learned a bit about how to write a flake. Currently, the flake provides a dev shell that can compile the userspace ui program natively, which is useful for rapid iteration, as well as binary packages which cross-compile the rust programs for the raspberry pi. I’ve decided that I can just compile the kernel module on the rpi, since this takes like 30 seconds, and I don’t plan on adding much to the kernel module (more on why later).
Something annoying that I ran into was that I could very easily cross-compile a “hello world” rust program (both from the dev shell and using nix build), but when I plugged in eframe/egui to get a GUI going, I ran into a bunch of problems since egui’s dependencies link to various system libraries.
Specifically, something was using the C standard library (glibc), and in my nix flake, the version it had available was v2.39, but the RPi had version 2.36, which was incompatible. I tried switching to an older version of nixpkgs, but any old enough version didn’t have the rust package tooling (I suppose this is a relatively recent addition to nixpkgs). Also, glibc is used for many many core nixpackages, so you can’t really drop-in replace it with an older version.
The ultimate solution to this was to use “cargo-zigbuild,” which uses zig’s (a programming language) linker for rust binaries. Cargo-zigbuild lets you specify the version of glibc that you want to link to as part of your target spec, which was exactly what I needed!
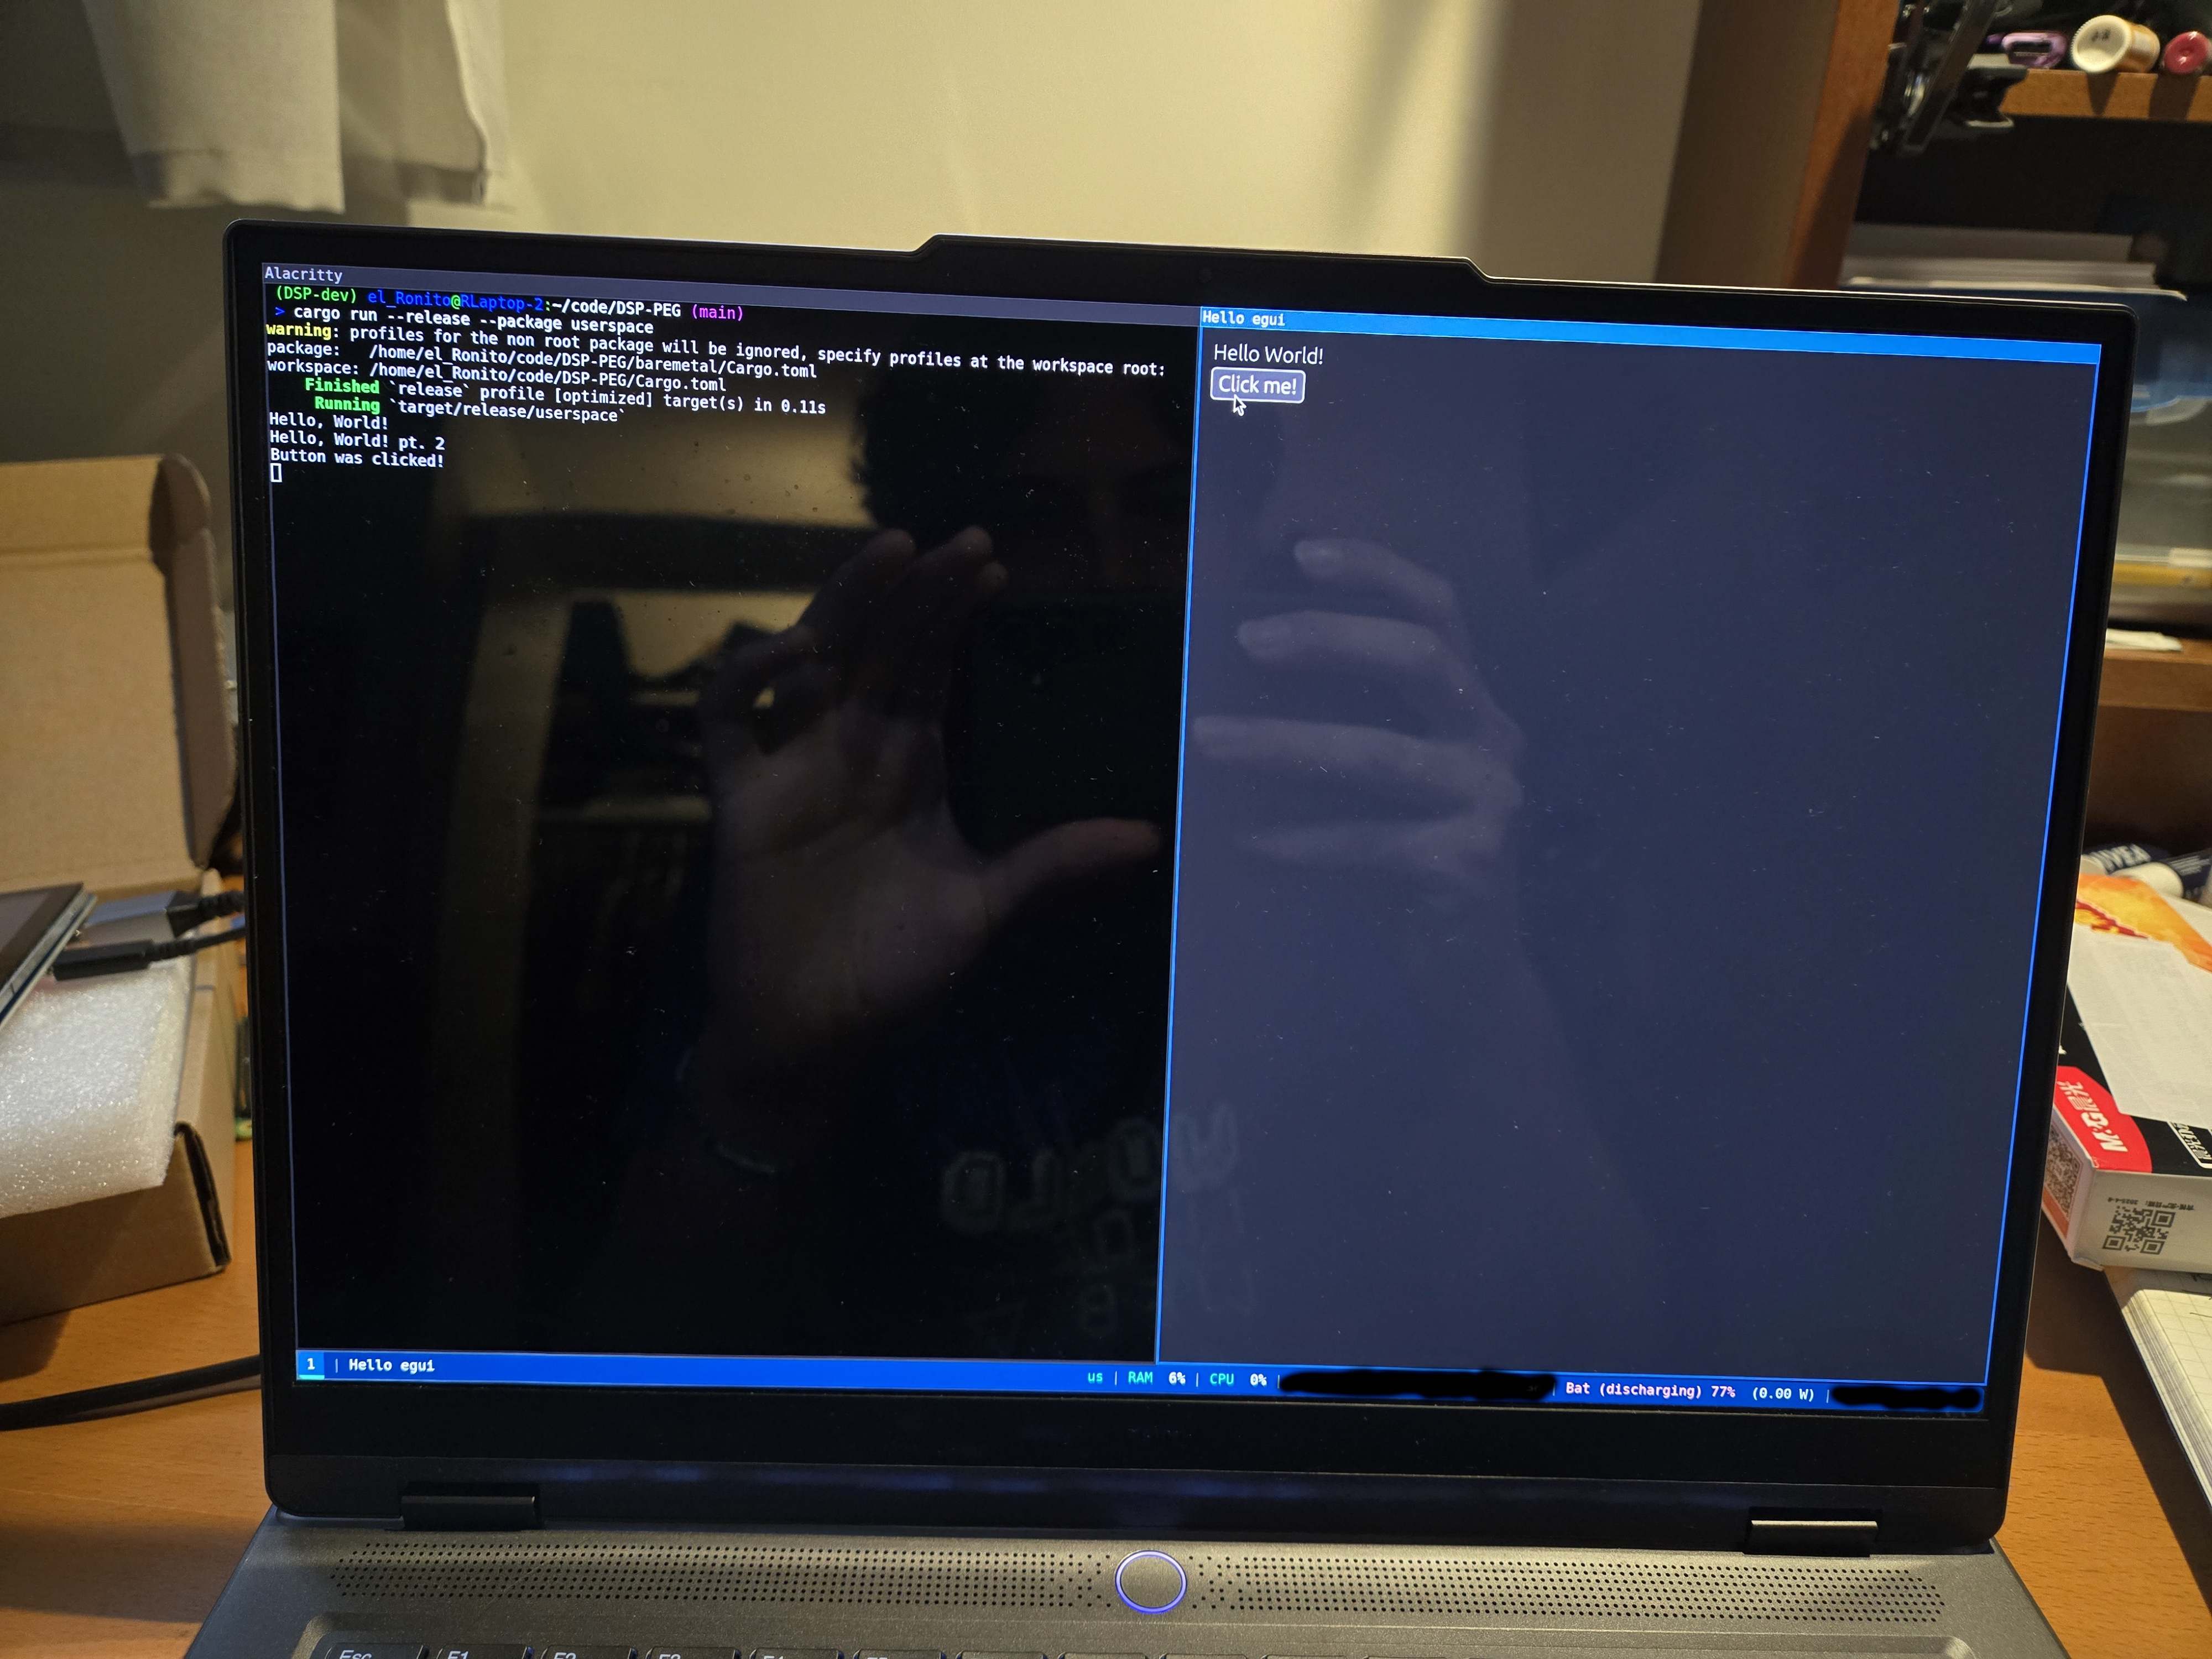
I also wrote some scripts for uploading the compiled binaries (output of “nix build”) to the RPi via ssh, and I set up the RPi to run the userspace program on startup. I tested this with a 7-inch hdmi display that I got off of Ali Express, and after some troubleshooting (mainly the linking problem described above) I was able to get the rust program to display “hello world” and an egui button. See the below picture of the hello world GUI being run on my laptop (from the dev shell; note that I was indeed able to get this to show up on the raspberry pi):
Kernel Module - What’s Next?
I did some research into how I could make my life easier in terms of implementing communication between Linux and the bare-metal program, and I discovered that it’s possible to map physical memory into the virtual memory of a program. This means that I can keep the actual Linux kernel module ultra light (I would just need to add a few more lines to implement a character device with “mmap” capabilities), and I would change the kernel module infrequently.
This means that I could continue to compile it on the RPi (instead of setting up cross compilation for Linux out-of-tree modules, which from what I can tell is a huge headache) without taking much of a hit in terms of compile time. It currently takes less than a minute to compile on the RPi, which is fast enough for me.
Under this design pattern, all the shared memory operations would be done by my userspace GUI app, which would claim (use “mmap” on) the minimal character device in the kernel module. This “character device” would really just point at the reserved shared memory region, which means that the userspace program would have direct access to that memory. I will then implement a lock-free message buffer (among other things later) which I can use from both bare-metal and userspace to talk back and forth between them!
So anyways, things are looking nice in terms of convenience; instead of separately implementing communication between userspace rust and the kernel module, and then between the kernel module and bare-metal, I can cut out the middleman and just communicate userspace rust to bare-metal rust directly (hooray!).
Also, the problem where the kernel module had to be loaded in twice for it to actually work was fixed by added a 10ms delay before emitting the ‘sev’ assembly instruction (I figured this out by trial and error lol). The behaviour of the kernel module seemed to suggest that CPU1 was not actually waking up the first time around, so I did some poking around with delays and calling functions twice to figure out how I could fix this.
Next Steps
Next up I need to wire up I2C and I2S to the ADC/DAC, work on implementing userspace <—> bare metal communication, build a simple input system (knobs and buttons) to control the UI on the RPi, and eventually (hopefully soon!) get a guitar effect running on bare metal as a proof of concept! The project is progressing nicely, and I am excited to see what I can get done in the near future.